# Using vMix with THEOlive
This guide explains to you how to set up vMix correctly so it can be used to stream your content with THEOlive.
## 1. Set up sources
Make sure all your sources are set up and in order. As an example, you could add simple color bars as a source by left-clicking the *up arrow* next to *Add Input*, which you can find at the left bottom of the vMIX screen, and select *Color Bars*. Similarly, you could add other input e.g. your webcam by selecting *Camera* or a stream by selecting *Stream/SRT*. In order to see these options, you'll have to select *More* in the *Add Input* menu.
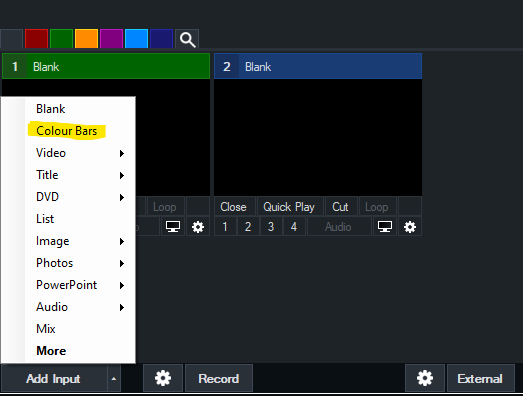
**Note:** The color bars input are only an example. You can stream whatever input you like.
> **📘 How to burn in a clock**
>
> If you want to burn in a clock you can follow the steps documented by vMix. You can create a *Production clock* input and burn it into the color bars input by configuring *Multiview*
[Production clock documentation](https://www.vmix.com/help23/index.htm?ProductionClocks.html)
[Multiview documentation](https://www.vmix.com/help23/index.htm?InputSettingsMultiView.html)
## 2. Configure stream settings
* Left-click the cogwheel next to *Stream* at the bottom of the vMix screen.
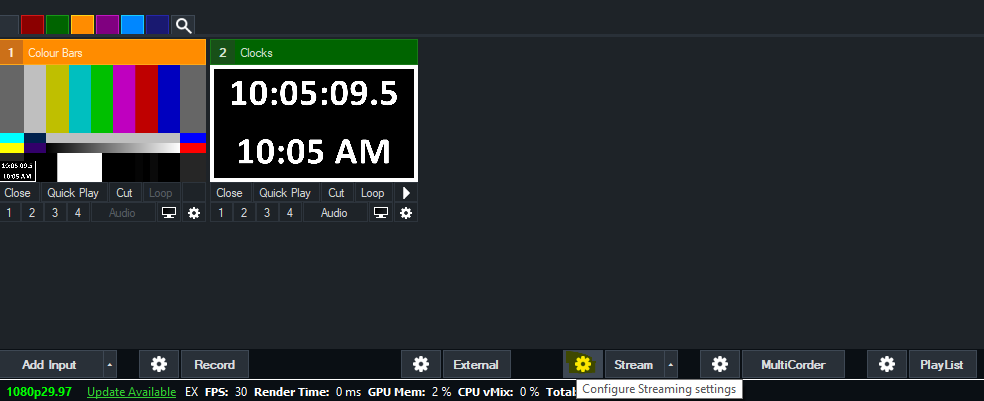
**Note:** Make sure you set up your settings first before clicking the *Stream* button.
* In the *Streaming Settings* select *Custom RTMP Server* as your destination and enter *your RTMP push URL and Streamkey* as follows:
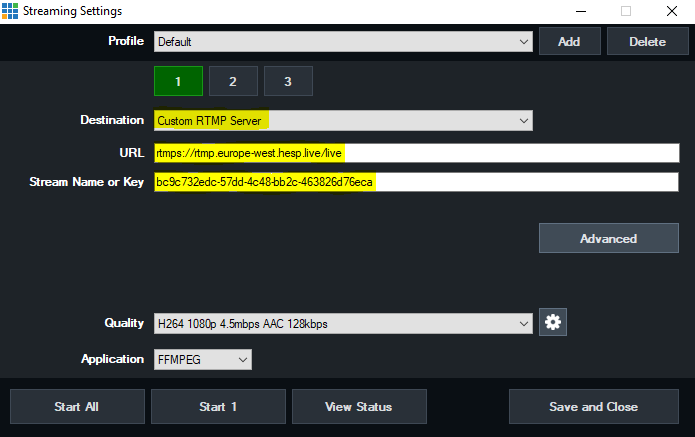
**Note:** You can find your RTMP push URL and streamkey in the THEOlive management console.
* Next, choose a set of stream values such as aspect ratio and bitrate from the *Quality* list and click the cogwheel for advanced *Streaming Quality* settings.
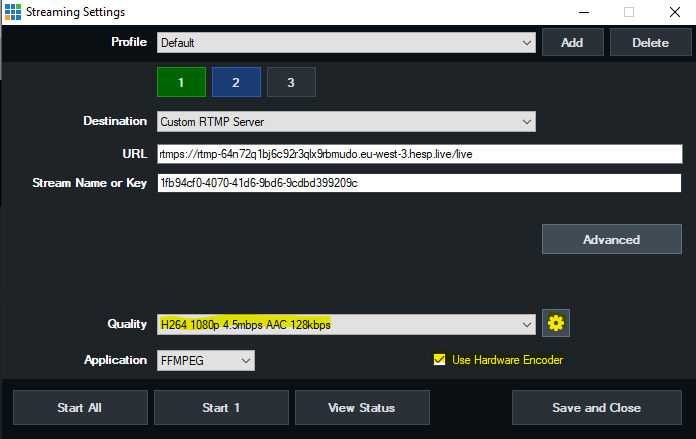
**Note:** If you have the hardware available: it's always a good idea to enable the *Hardware Encoder* setting.
* In the *Streaming Quality* menu you can make some more advanced changes to your stream settings. Please use the settings that are highlighted in yellow in the following image to achieve optimal performance when streaming to THEOlive. You are free to change the *Video Bit Rates* and *Encode Size* settings depending on your use case.
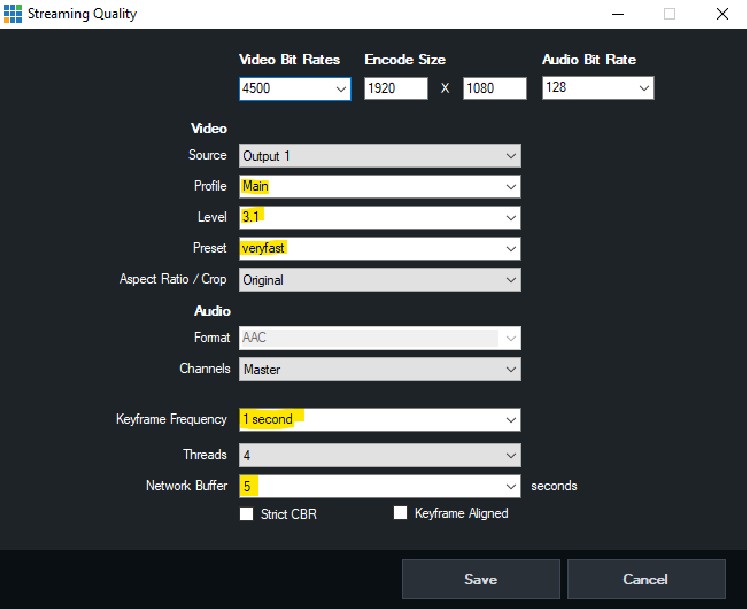
**Note:\*** You are free to experiment with your encoding settings but the values shown in this image reflect the encoding setting THEOlive uses on the server side.
> **🚧 Frame rate and bandwidth**
>
> Remember to set the frame rate to the same value as in your THEOlive channel ingest configuration and make sure that your encoder has a stable connection and enough upload bandwidth. See [Stream configuration](https://docs-preview.optiview.dolby.com/pr-861/theolive/v1/contribution/stream-configuration.md) for more details.
## 3. Start streaming
You can now save and exit out of all the *Streaming Settings* menus and click the *Stream* button to start streaming.
## 4. Start your THEOlive channel
This can be done either through the [API](https://docs-preview.optiview.dolby.com/pr-861/theolive/v1/api/channels/start-channel.md) or via the [management console](https://console.theo.live/).